WAITING FOR THE SHADOW

Solar Eclipse Observing and Photography - Joseph Cali

PHOTOGRAPHY ECLIPSES
ASTRONOMY
HOME PAGE


Home-Made Six Inch ƒ7 Newtonian Reflector


I made a 6" f7 telescope as a teenager in the late 1970's. I ordered a telescope making kit from the Brisbane store of Astro-Optical supplies which arrived in early August 1978. This is the kit Phil Owen referred to in the School Astronomy Club news.  I don't remember the trading name they used at the Brisbane shop, different to the Sydney parent, because we all used to (unkindly) nickname the shop owner "Rip-off-Ralph,"  and refer to the shop as, "Rip-off-Ralph's."


The kit contained two pyrex 6" blanks, a mirror and tool, and a range of abrasives from course to fine. I ground the mirror to fine grind stage during the latter part of 1978. Unsure how to proceed with the polishing, I joined the Amateur Telescope Makers Club of Queensland early in 1979.

The late Cliff Duncan mentored my mirror polishing and figuring. During grinding, I had in my youthful impatience, turned down the edge. In hindsight, I think that Cliff, in a Mr Miyagi, Polish on-Polish off moment, saw an opportunity to teach me some patience and application and convinced me to polish out the turned down edge. Some hundreds of hours of polishing and a year later, I had a spherical surface. I had mixed feelings of disappointment and appreciation, when Cliff himself did the final figuring while I was away with my parents on a family holiday. Cliff was a master optician and this mirror, like all his other mirrors was damn near perfect. It holds its own when sitting next to a Takahashi TOA150.

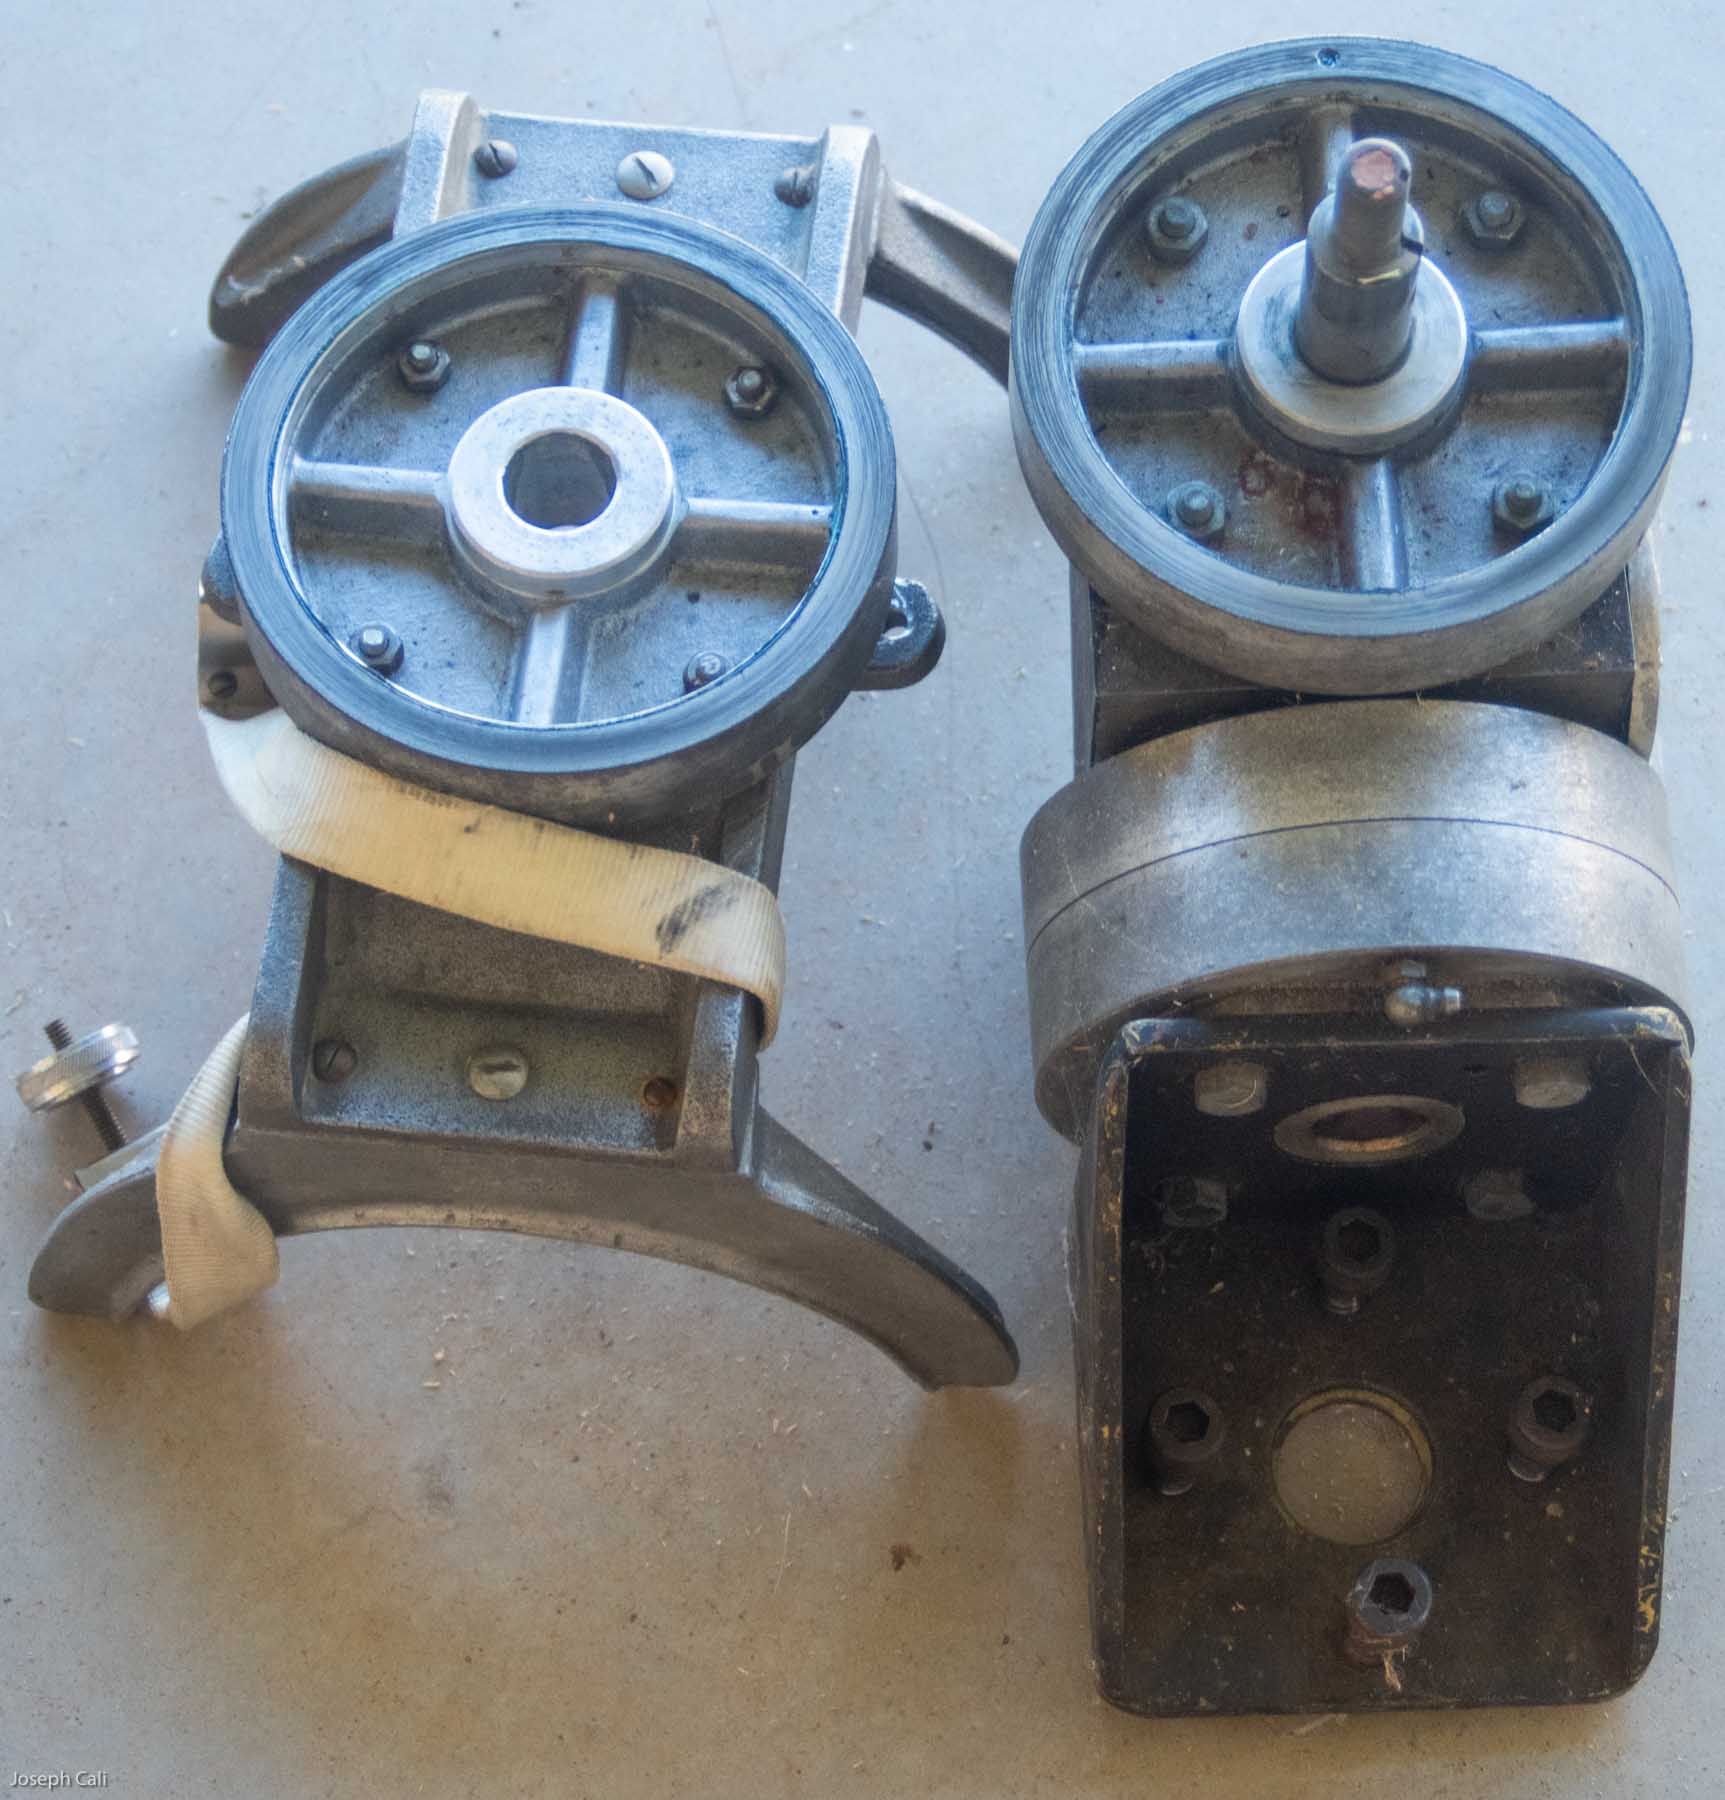
The mounting and tube components were made by first purchasing ingots of aluminium from SIMS METAL recyclers.  The club, or more precisely Cliff, had a furnace/foundry in his back yard.  We would melt down the aluminium and using sand moulds, cast parts. My nickname in the club was "Hacksaw Joe." It was not intended as a put down, it referred to the fact that I could cut the feeder pieces off the castings (fettling) more accurately than almost anyone else except Cliff who taught me the accurate hacksaw technique. The castings were then machined into the various components, bearings, pier legs, right angle angle brackets, saddle plate, tube yokes, tube rotation rings, mirror cell and focuser base. 
We also purchased zinc ingots to cast counterweights.  The counterweight arm has an internal drive thread. A small steel fork protrudes through the milled slot and by rotating the steampunk wheel, that was also cast in aluminium, it could be rotated to move the counterweight up and down to adjust the polar balance.


The spider was fabricated from purchased brass tube and bar and vanes from high tensile spring steel strips. The telescope mounting design was based on the Porter-Springfield design of the 1930's in the USA but did not go so far as to redirect the optical axis down through the Dec and to the base of the Polar shaft as in the original Springfield.

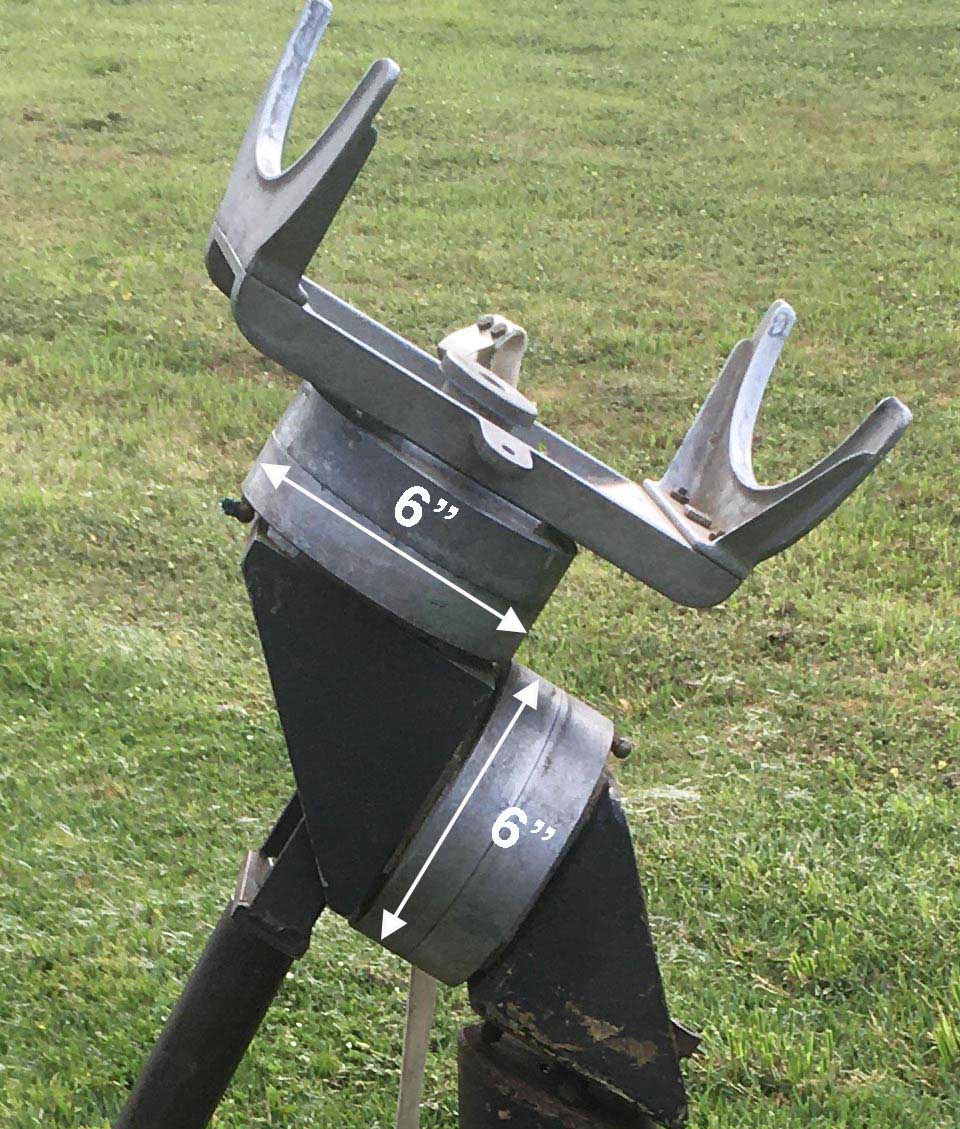
Cliff liked the stability provided by the very large bearing surfaces. His rule of thumb was that the diameter of the bearings should be the same as the diameter of the primary mirror hence my bearings faces are six inches diameter. My 6" bearings have the 1" steel shaft running directly inside a thick machined aluminium boss. The steel shaft is press fitted inside one side of the bearing. The shaft doesn't rotate, just the bearing  with the hole. Wear has not been an issue with my lightish weight 6" OTA. Larger versions had a brass sleeve press fitted to line the boss. Either way, t
his makes for a very smooth motion. After a recent clean and re-grease, it was a bit too slippery at first but this is gradually sorting itself out. Usually, it is a very smooth and easy one axis equatorial push motion.


I believe they also did some of the same design up to 12" in the years after I left Brisbane but I have never seen any of  these mounts.  Although the aluminium equatorial head is light(one picture shows me lifting it with one of my fingers, I would not want to lift a scaled up 12" model.


It was all incredibly time consuming but the most valuable part was that I learned so much about engineering and fabrication in the process including the use of lathes and other machine and hand tools, skills that ultimately proved very valuable in my career working in mass spectrometry. Without manufacturer engineers available in Australia, troubleshooting, diagnosis and repair of complex and delicate scientific instruments fell under my range of responsibilities in addition to the research, workplace safety, and lab management functions.

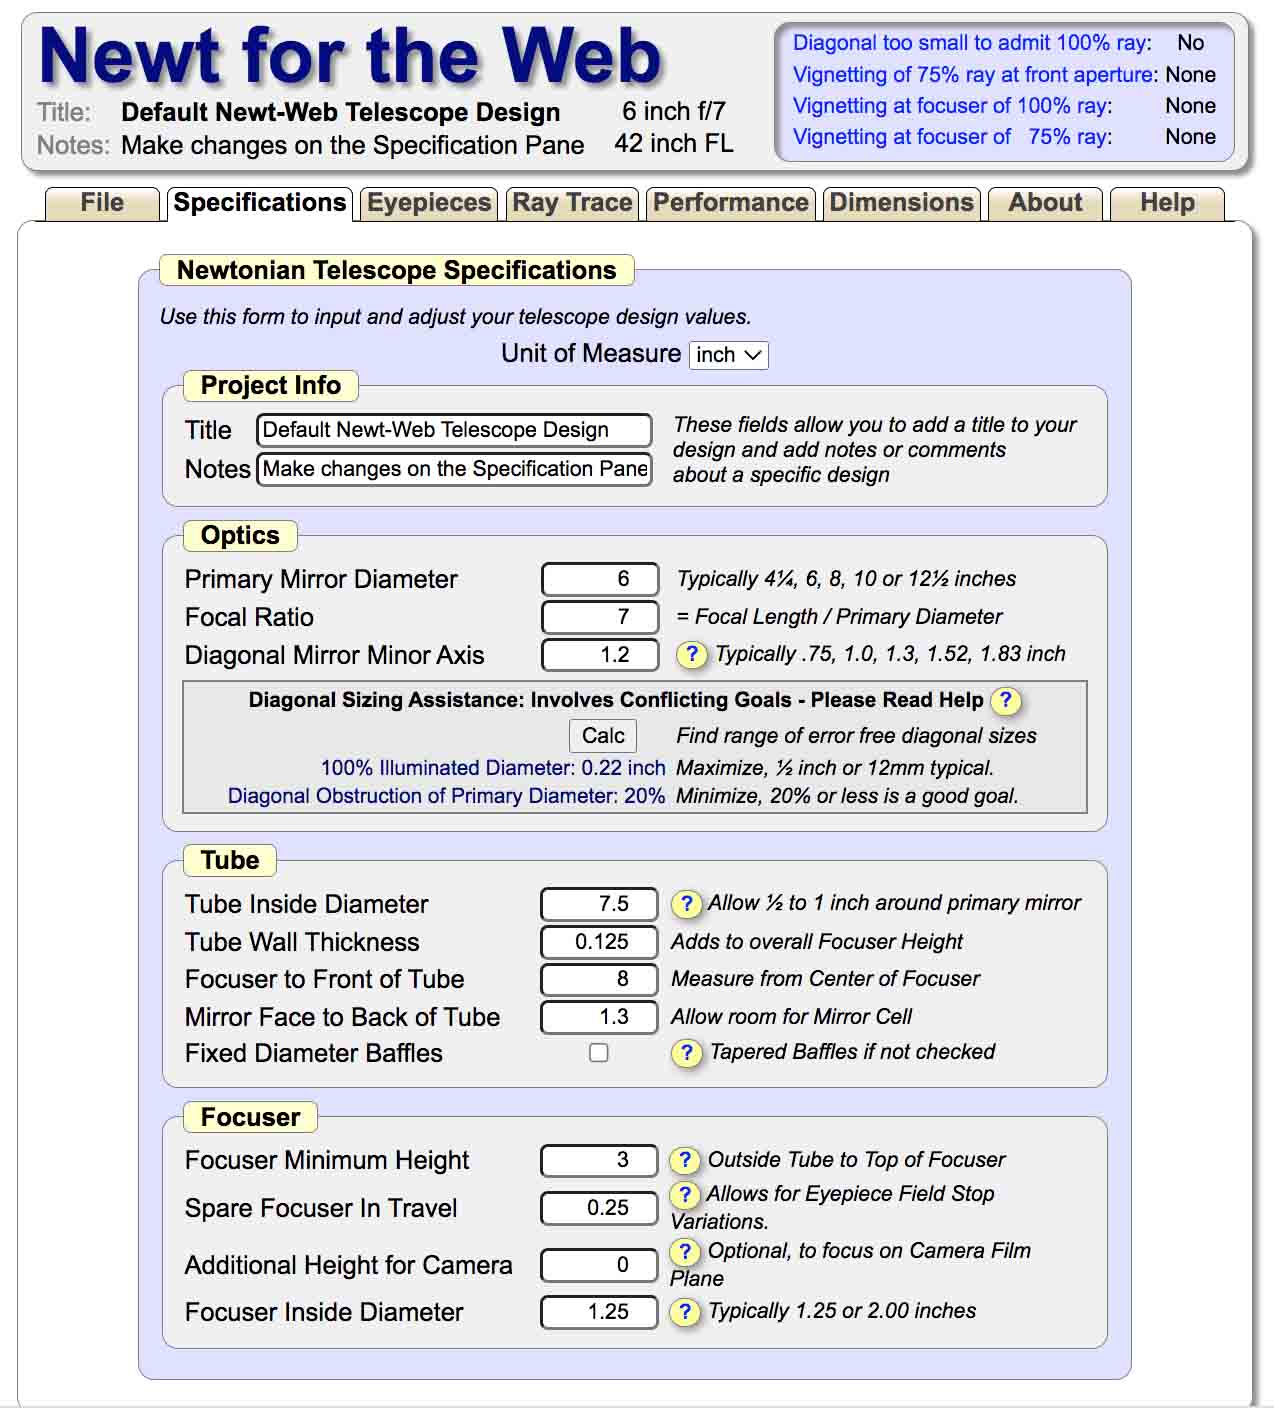
Two years after starting the grind, August 1980 the components were all finished. I drilled, mounted and assembled components in the OTA, same with the mounting, and first light. The secondary obstruction is 3.5% making it a superb visual instrument. The rotation rings do not allow for any tube slide to balance so I initially placed the rotation rings on the tube without screwing them in place. Then experimented with the tube balancing until satisfied before drilling and screwing the rings in position.
The images were initially triangular. In fixing the mirror in the cell, and not wanting the precious mirror that had taken so much time to grind and polish, to fall out, I had over-tightened everything in the mirror cell. Once I released the tension, the mirror regained it's perfect figure and the images were beautiful as they still are 42 years later. A range of pictures are attached.

The most fantastic feature of this scope are rotation rings that allow the eyepiece orientation to be easily rotated into a position for comfortable viewing regardless of where the scope is pointing. Uncomfortable eyepiece position is a huge disadvantage of most equatorially mounted newts. The rings recently had become quite sticky. The old dry lube had become quite sticky and impregnated with grit. A thorough clean with kero and new lube application to the rings and yokes, this time with candle wax has fixed the problem.


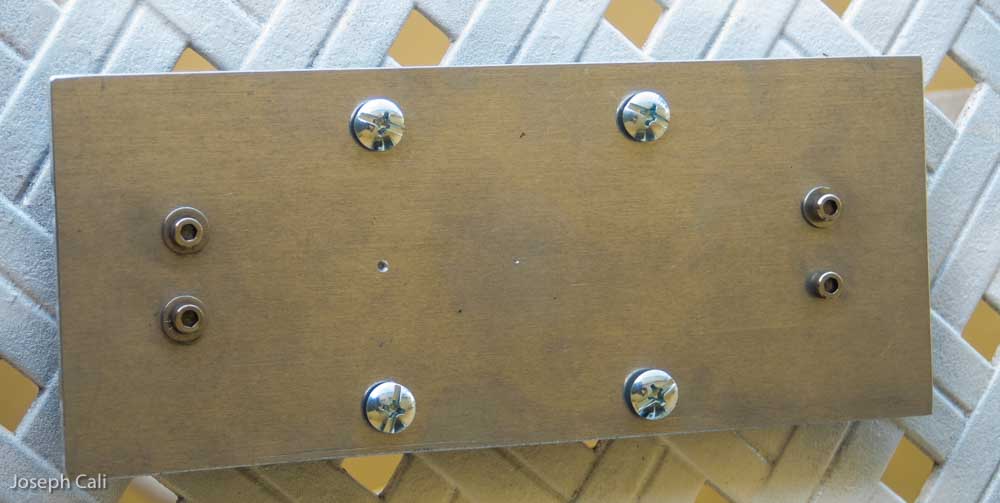
I have also made a jig/adaptor so that I can remove the saddle plate and yokes and attach them to a dovetail allowing the OTA to be used with my Takahashi EM200 GOTO mount.


The original finderscope was made from the objective and eyepiece from a pair of 7x50mm binoculars mounted in PVC drain pipe.  I purchased these mechanically unrepairable binos for $5 from a binocular repair shop owner.  At the time I took these photos some months ago, I had temporarily taped a 63mm binocular objective into the end of the PVC tube to test and have since made this arrangement permanent using high strength, high temperature epoxy resin metal putty. 
I have also replaced the eyepiece with a very nice plossl making a beautiful 9x63 finder, highly recommended for older failing eyesight.


The steampunk wheel at the base of the counterweight shaft turns a 5/8" thread inside the steel tube. A fork protrudes through a milled slot in the steel tube to push the zinc counterweight up or down.

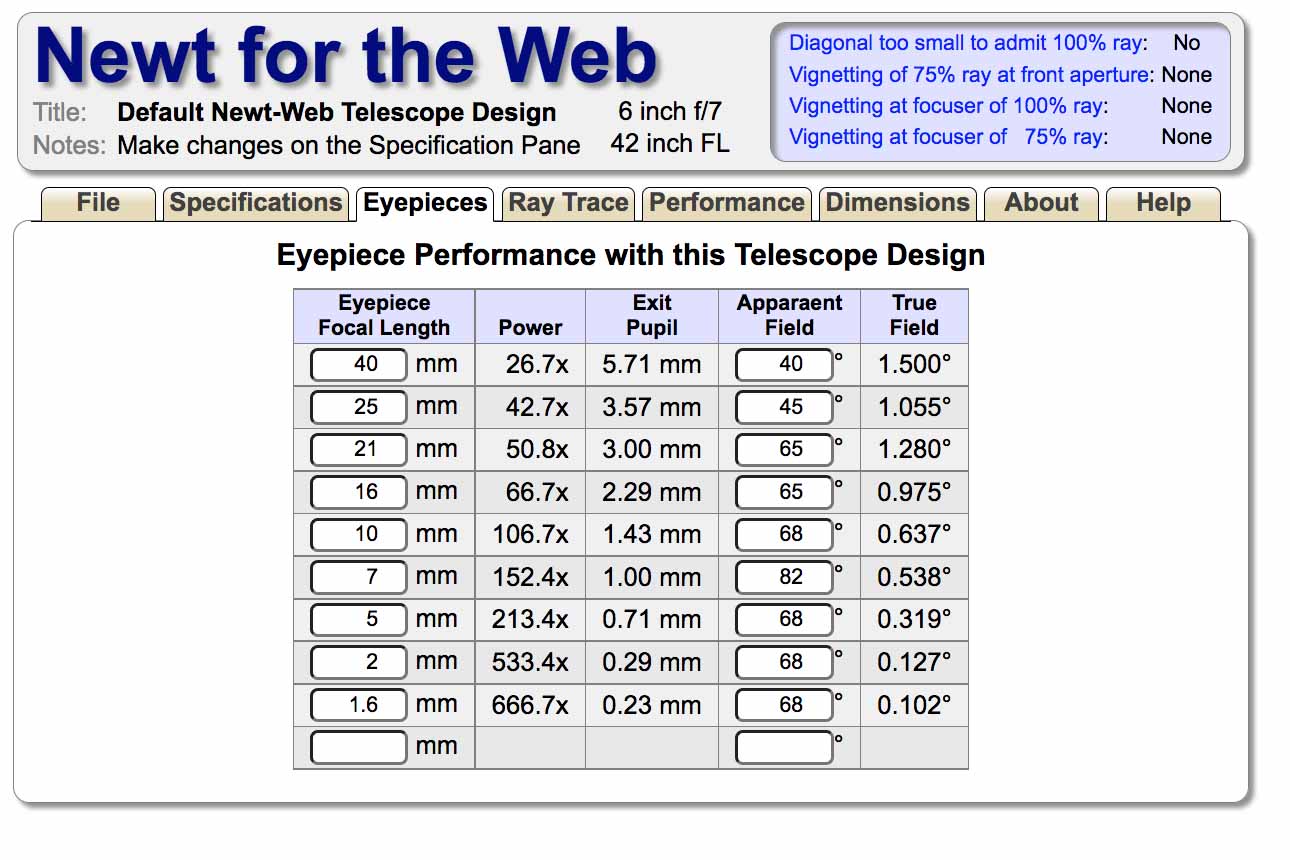
The focuser is made from several machined and polished sliding brass tubes. Using a combination of twisting combined with a push pull motion gives a very easily controlled, smooth, fine control of focusing, as good as any Moonlite or Feathertouch Crayford for visual observing.  The focuser only takes 1.25" eyepieces but given the 3.5% diagonal obstruction, 2" eyepieces would be wasted. I currently use 6 eyepieces plus a TV barlow if conditions allow:-

Eyepiece
Magnification
Field of view (o)
Exit Pupil (mm)
Unitron 40mm Kellner 26
1.5
5.7
Denkmeier 21mm
50
1.3
3
University Optics König 16mm 66
1.0
2.3
Denkmeier 14mm 75
0.87
2.0
Pentax XL10  
105
0.65
1.4
Televue Nagler 7mm 150
0.55
1.0
Pentax XL5 210
0.33
0.7

 
On a night of exceptional seeing at Mt Tamborine Observatory in May 1984, and I do mean truly exceptional, Arthur Page loaned me his 6mm Clavé eyepiece and 3x barlow. I had the scope at 500X showing crisp, clear, clean, images of Jupiter, Mars and Saturn. I have only struck similarly stable conditions that good on 3 nights out of 44 years of observing, two nights in May 1984 at Mt Tamborine and October 13, 2020 near Yass.


The scope is now in it's 42nd year of use.  I used it on most of the 15 clear nights over last Christmas 2021 to observe Comet Leonard. The almost entirely aluminium mount is virtually weatherproof so I mostly leave the mounting outside so that I only need to place and attach the OTA with the parachute tensioning strap to be up and running.  The paint job on the tube is a bit chipped and scratched from 40+ years of abuse but is the original paint job I applied 42 years ago. 


The mirror coating had degraded. Four years ago I paid $420 to have a high quality (Palmway Optical) enhanced aluminium and silicon monoxide overcoat applied to the mirror and secondary. It made a huge improvement to the optical performance and I realised that though the original coating was very good, the second coating which had been on the mirror for almost 25 years was not very evenly applied and this had affected the scopes optical performance. I sustained an eye injury that affected my visual acuity around the same time the second aluminised coat was applied and I had always put it down to my eyes. 

A few months later, I did a side-by-side comparison with a friends Takahashi TOA150. I wrote up a description of the night and collaborated with him on the wording of the descriptions of the comparisons to avoid personal bias as much as possible. The write up of the comparison is elsewhere on this web site if you are interested.
https://joe-cali.com/astronomy/articles/comparing_reflectors_and_refractors.html


The scope saw first light in August 1980, 2 years after I commenced the build. Although I have a Vixen VC200L and an 18" f5.5 dob, I still get a lot of pleasure using this scope very regularly, now in it's 42nd year of operation.
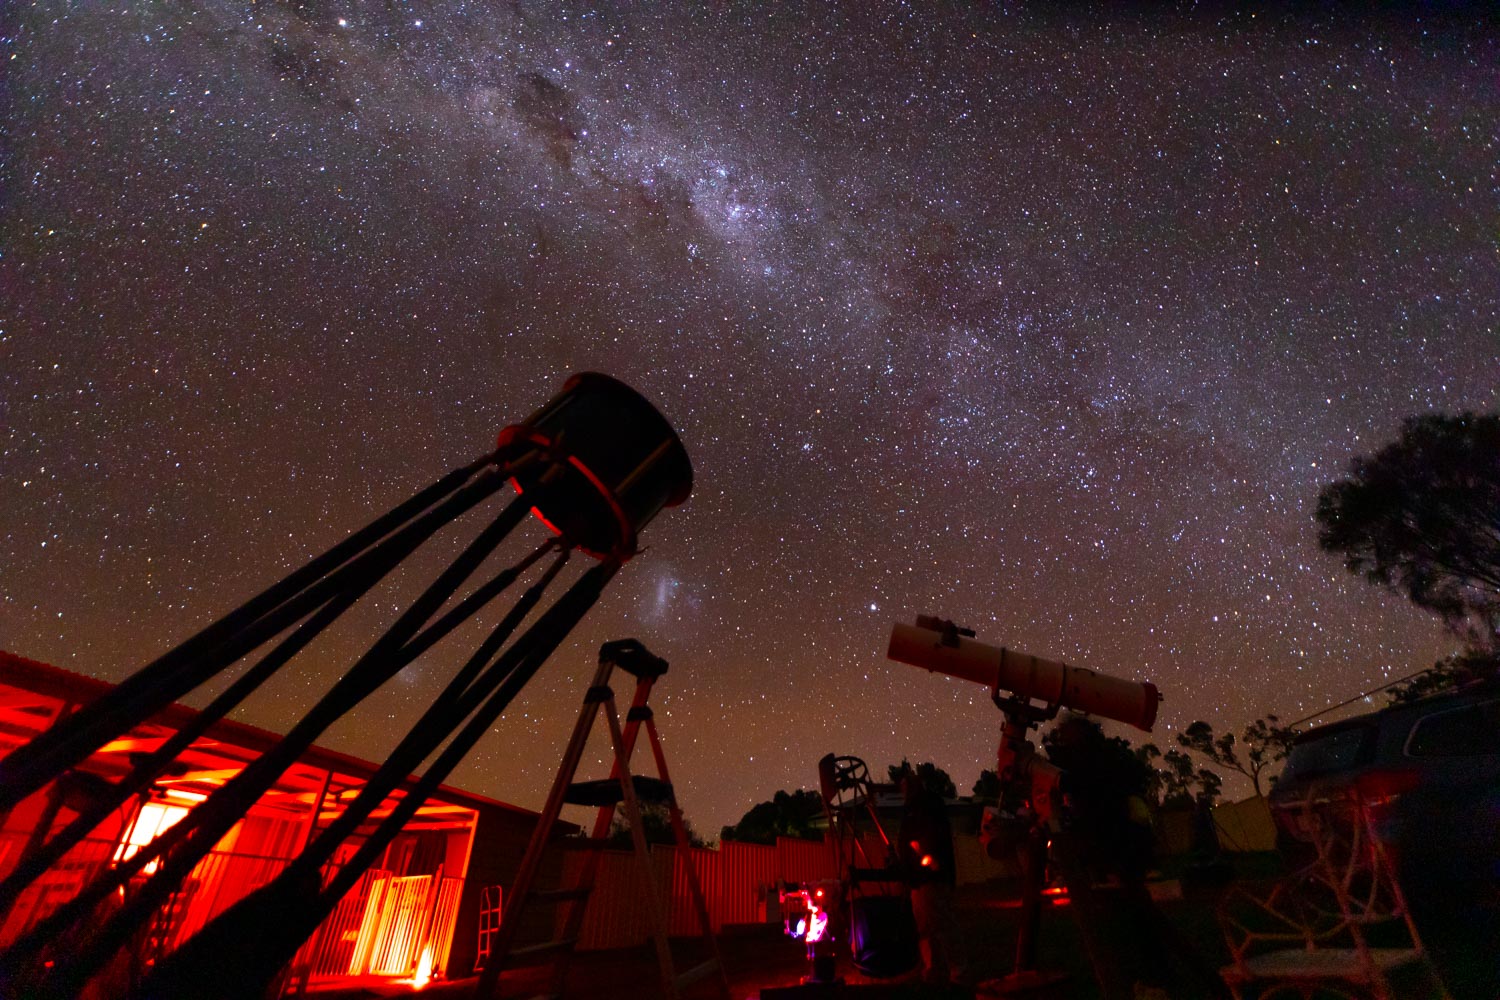
I now live most of the time under beautiful Bortle 1/2 rural skies between Young and Cowra 148E 34S. In the picture below, my 6" f7 is mounted atop my Takahashi EM-200 Goto mount on the right of this photo by Andrew Wilson at a 2021 observing weekend I hosted at my property. Front left is my 18" f5.5, formerly Matt Sarikko's (Guinevere) scope, in the background Nick Potter's 14" Hubble Optic Newt and in the background shadows Phil's("ISSDAOL") Tak CN212 is hiding.

photo credit: Andrew Wilson

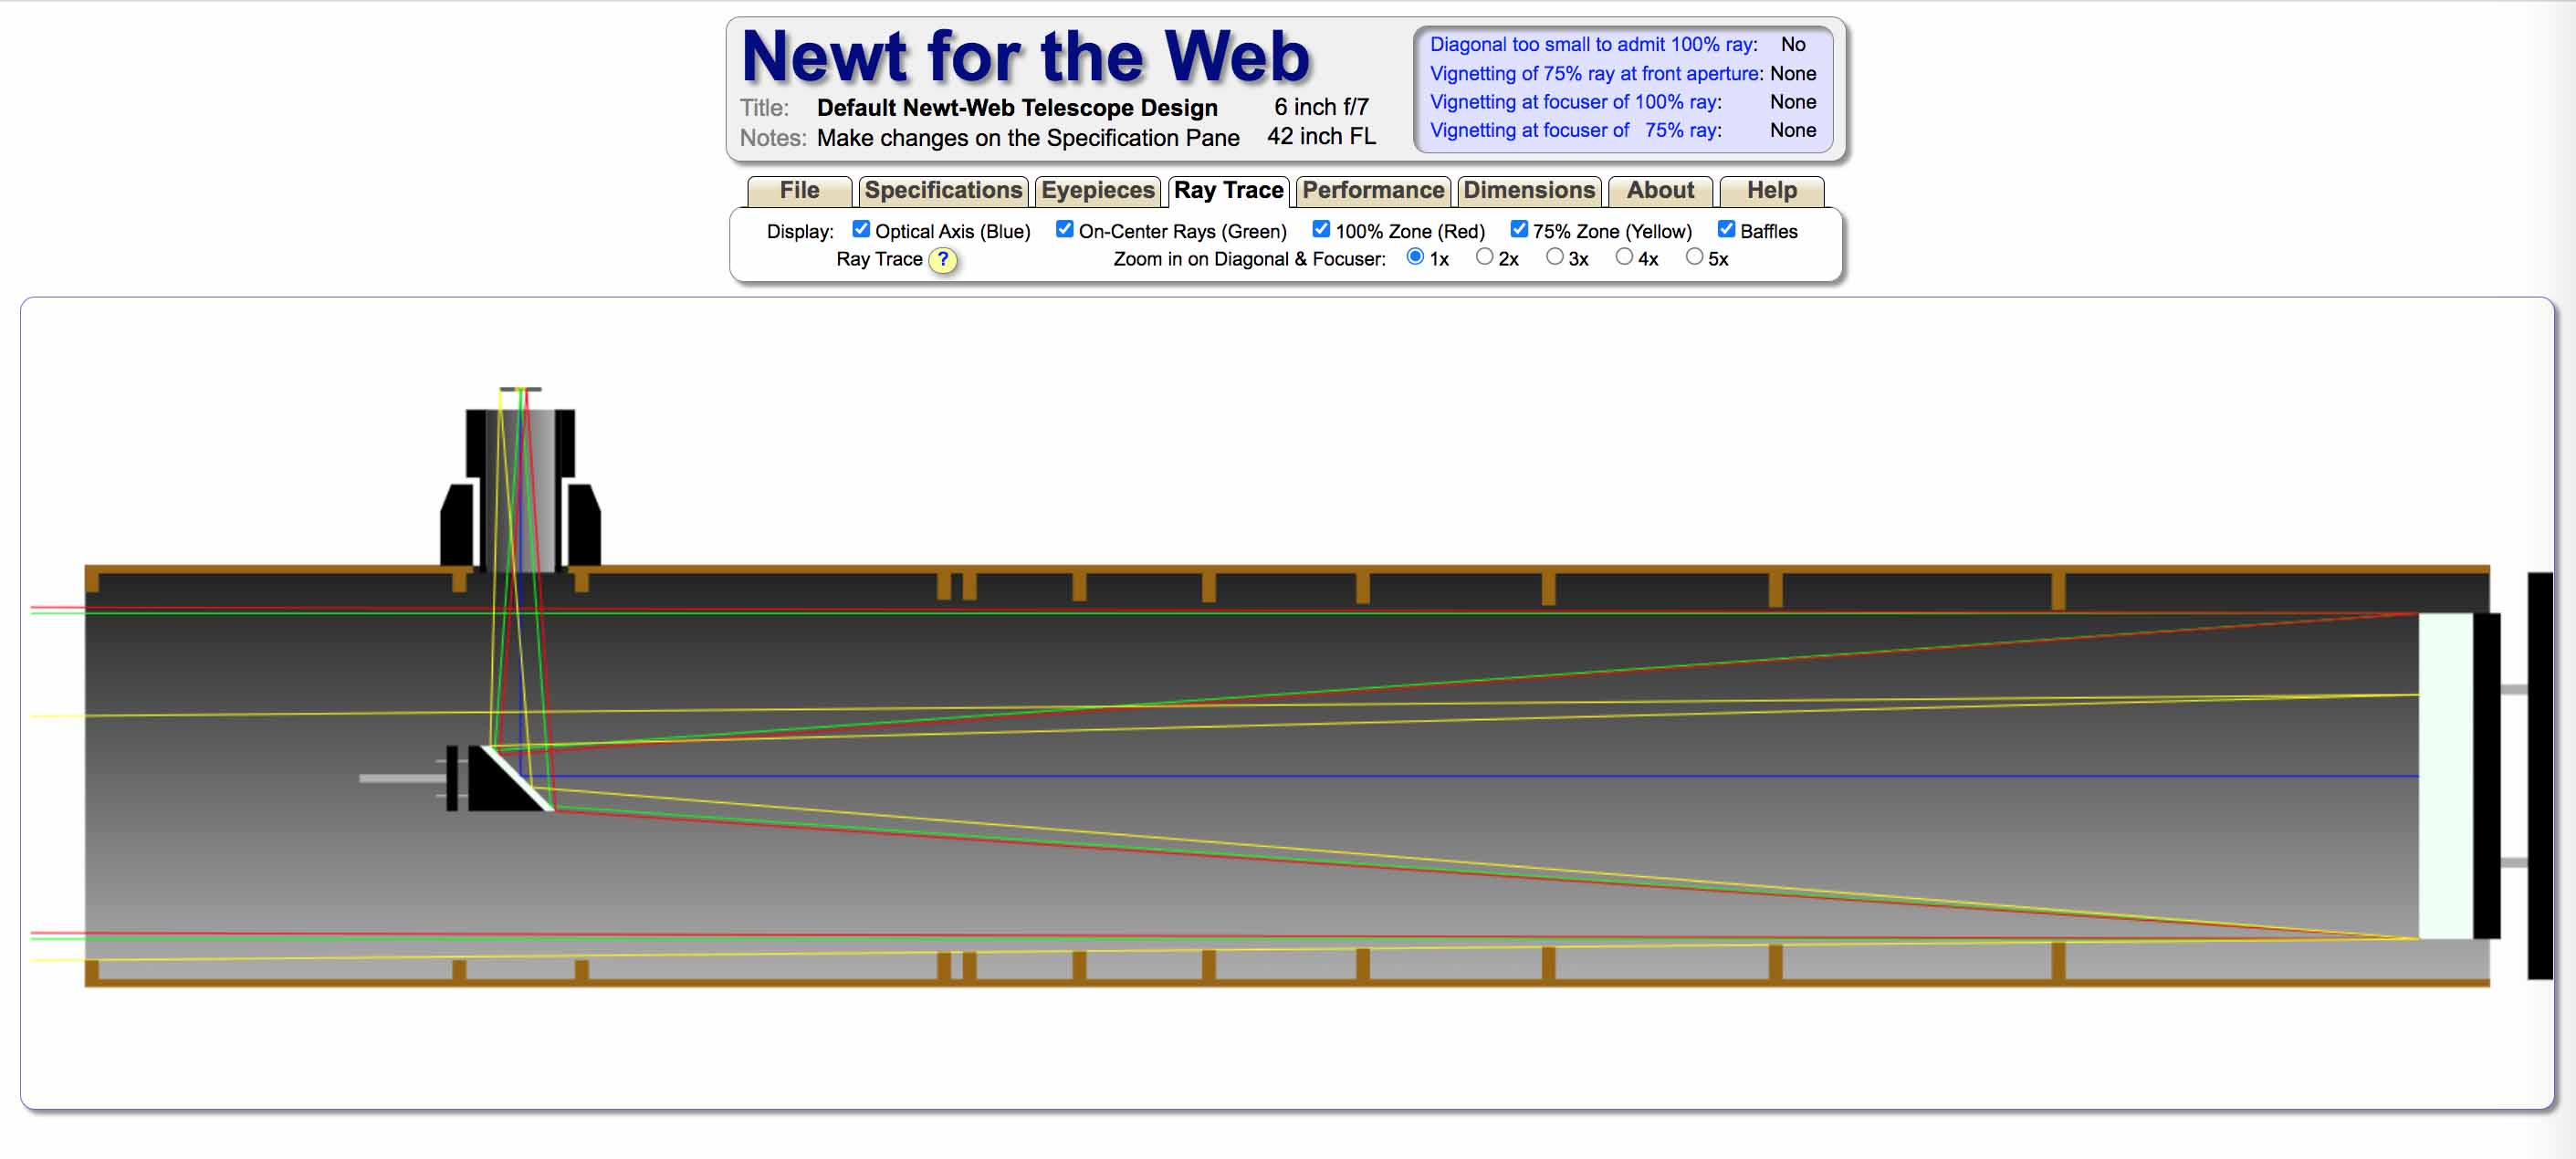
Below is an a ray trace and performance analysis of the telescopes performance after entering the design specifications into the program. 


You are on the page "Home made 6" ƒ7 Newtonian Reflector"
Related articles:     
A side by side comparison between this scope and Tak TOA150
https://joe-cali.com/astronomy/articles/comparing_reflectors_and_refractors.html

Simple Pleasures, Last Friday - essay about the first night out with the instrument and a new reflective coating after 20 years with a poor coating
https://joe-cali.com/astronomy/articles/Last-Friday-Night-Essay.html


PHOTOGRAPHY ECLIPSES
ASTRONOMY
HOME PAGE