WAITING FOR THE SHADOW

Astronomical Observing and Photography


PHOTOGRAPHY ECLIPSES
ASTRONOMY
HOME PAGE

Collimating a Newtonian telescope


Collimating a Newtonian Reflector
Joe Cali
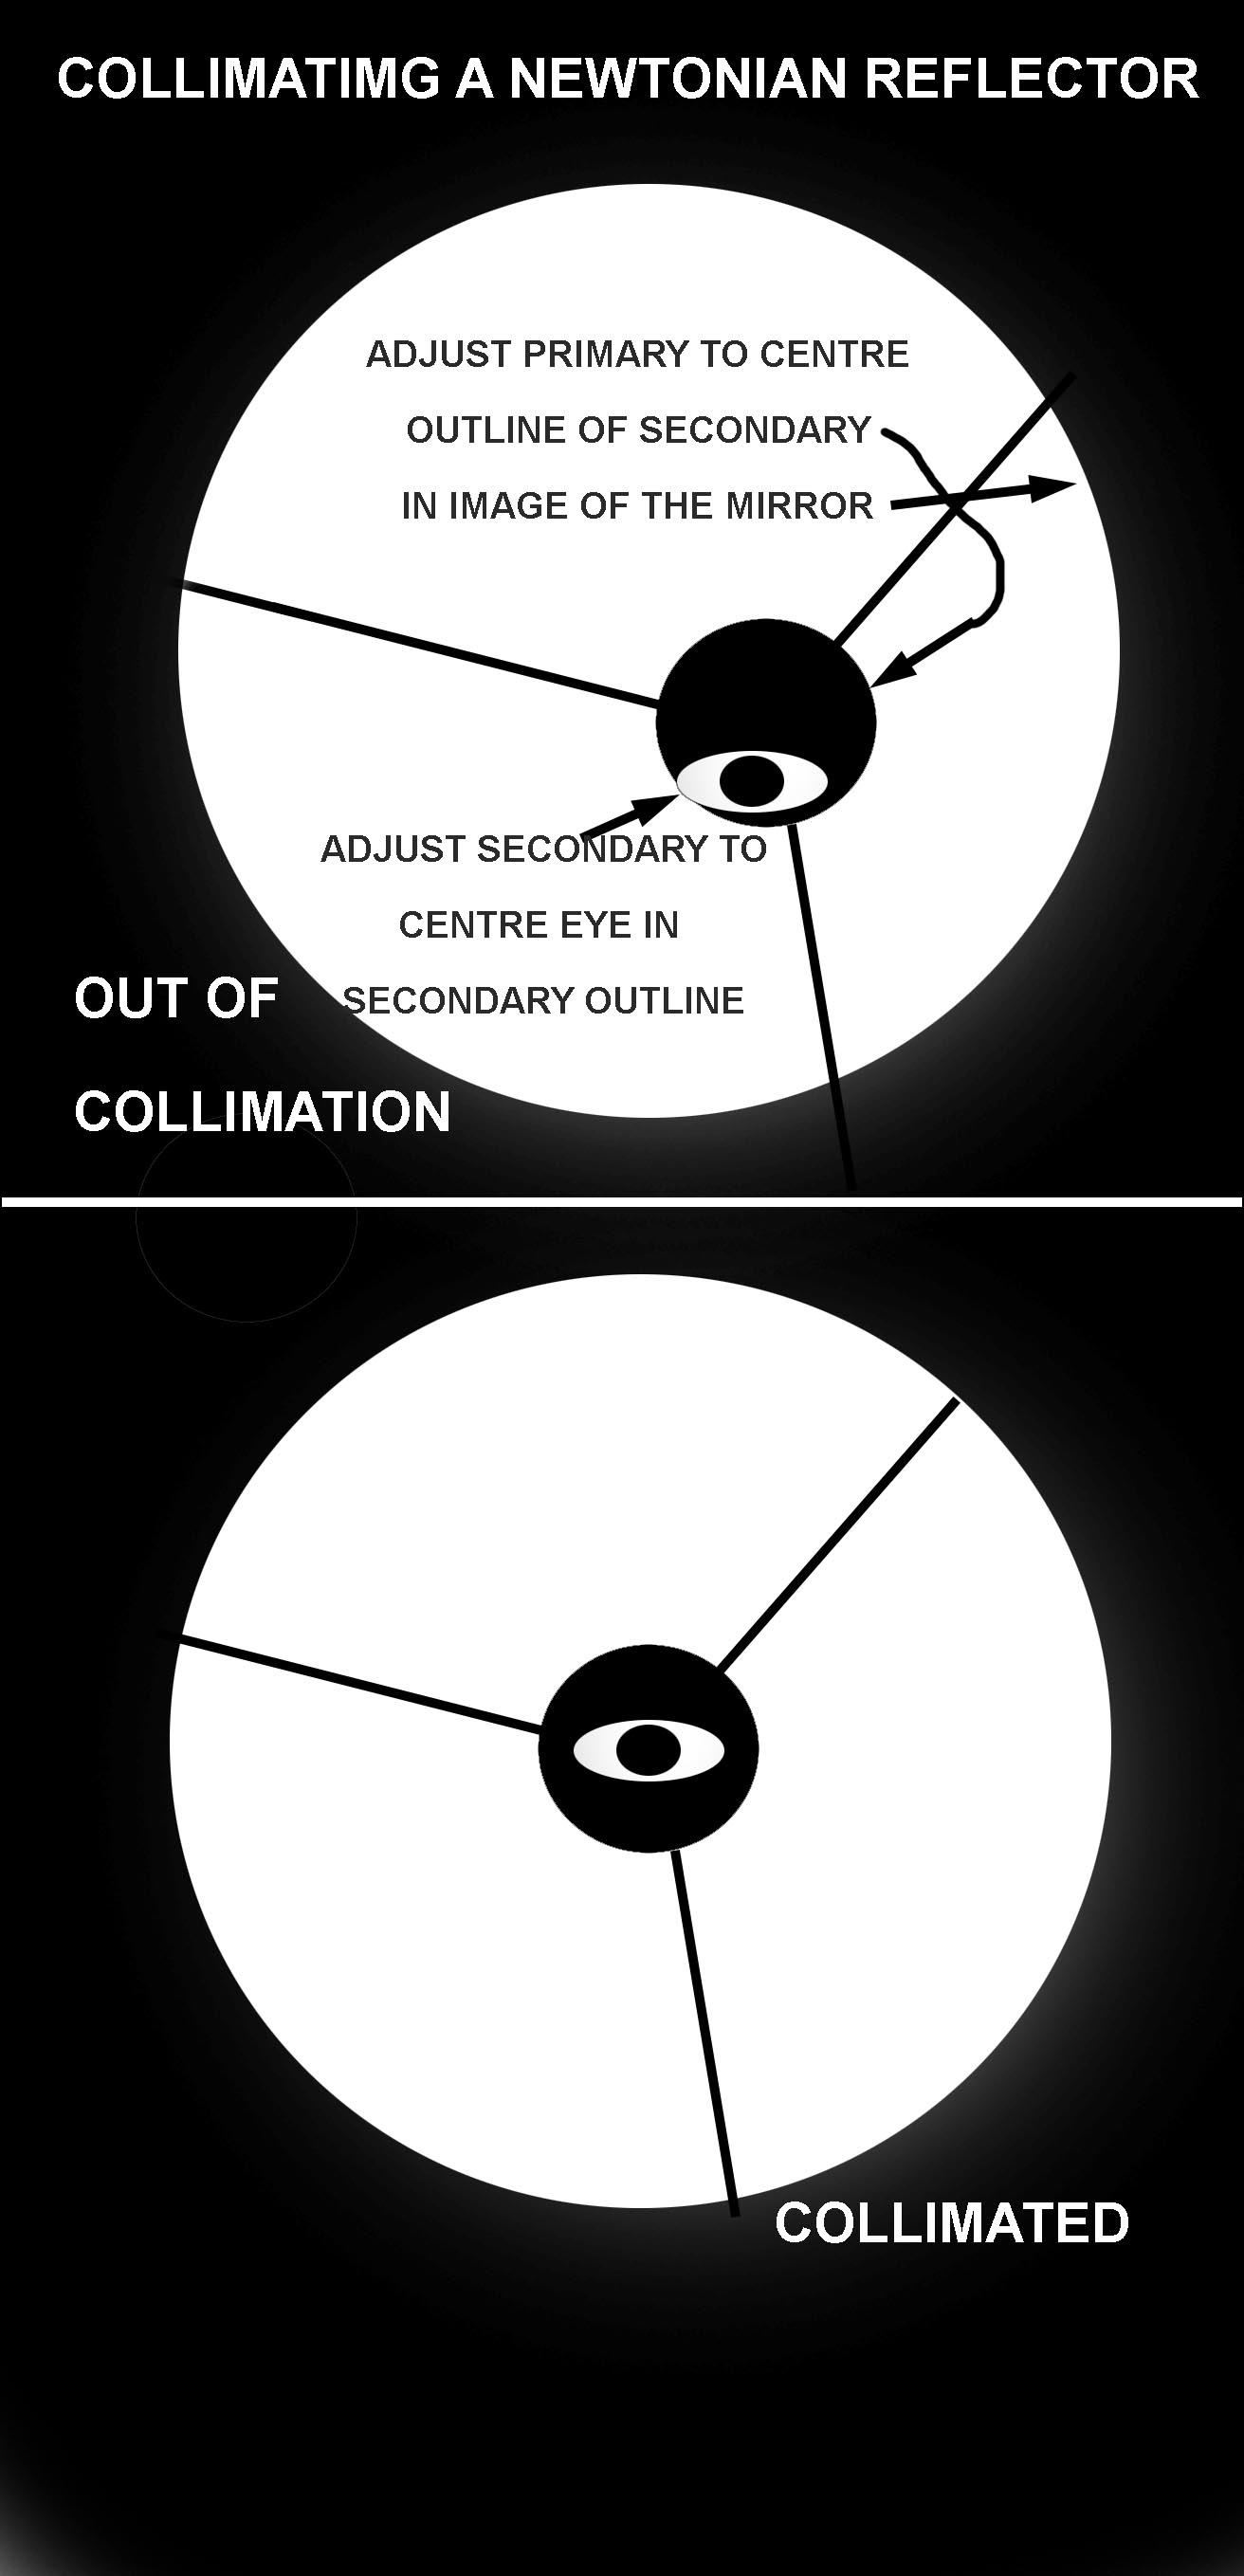
Collimating a Newtonian reflector fills new telescope owners with fear yet it is a relatively simple process.  With the telescope in a normal position, pointing  about 20-30 degrees above horizontal, look into the eyepiece holder with the eyepiece removed.


If the instrument is collimated, everything should look concentric as in the bottom illustration. If it is not then:-


ADJUSTING THE SECONDARY MIRROR
1.    First adjust the small screws on the back of the smaller diagonal mirror until you can see the whole of the big mirror centred in the diagonal mirror. You should also be able to see your eye centred in that small mirror.

ADJUSTING THE PRIMARY MIRROR
2.    Adjust the screws on the back of the big rear mirror until the silhouette of the small mirror is centred over the big mirror. Some mirror cells have three screws with springs to keep the tension.  Better designed cells, have three pairs of what are called push pull screws to move the mirror. In each pair, one screw pulls the mirror holded toward the rear plate, the other pushes against this.  They are a little more time consuming to adjust.  The pull screw needs to be loosened before the push screw can be adjusted.  When the adjustment is complete, tighten the push screw carefully until they are tight.  Push-pull mirror cells don't lose their collimation as often as spring loaded cells.

3.    If the scope is way out of collimation, you may need to cycle through steps 1 & 2 more than once.

4.    Check the diagonal again and make any minor adjustments to centre the image of the big mirror and your eyes reflection.  This should only be necessary if the collimation was way out at the first step. 

5.    Make sure any lock nuts on adjusting threads are tightened to prevent slippage or loss of collimation.


Adjusting the Finderscope

1.    In the main telescope, scan along the horizon and point the scope at a static easily recognised object on the horizon, eg distant house, tree, power pole. Center the object. Lock the scope axes if possible. Whatever you select, make sure it is unique and easy to identify. 

2.    Look in the finder scope and spot the object you centred. Using the adjustment screws on the finder scope, bring the object to the centre cross hairs.  Check that the object is still centred in the main scope. Then check that it is still centred in the finder.


Adjusting the Focuser

The focuser of the main telescope,  usually has one of two types of focuser. A rack and pinion focuser has a linear rack gear along the outside of the focuser tube. There are usually two small screws to adjust the tension of the pinion gear on the rack.

More common is what is called a Crayford focuser. A Crayford uses 4 small roller bearings to oppose the force of a round shaft with focussing knobs. 

There are usually two screws near the point where the shaft crosses the drawtube. One screw adjusts the tension/friction. Too loose and the tube just slips unable to hold focus, too tight and the tube locks and turning the know doesn't adjust the focus.

The other screw is to lock the focusing tube once it's in position. 

The locking screw is usually the one closest to the telescope tube, the one closer to your eye adjusts the tension


Good luck and enjoy your scope

⁠Joe Cali⁠


PHOTOGRAPHY ECLIPSES
ASTRONOMY
HOME PAGE