 |
WAITING FOR THE
SHADOW
Astronomical Observing and Photography |
| PHOTOGRAPHY |
ECLIPSES |
ASTRONOMY |
Revised rule for tripod shots using DSLR's
and digital cameras - the "CSS" or "Cali Stationary Stars" Rule
By Joe Cali
A
discussion on an astronomy forum in early 2013 discussed how long an untracked
camera on tripod exposure can be left open before trailing becomes
objectionable. Some authors of posts indicated they used a fixed time of 30s
while others referred to the “500 rule.”
The
old “600” rule states that –
Maximum
exposure in seconds = 600 / Lens focal length (mm)
I remember using these
rules or formulae back in the 1970's and they hark back to the days of film and were based on a set of
starting assumptions about film grain size, size of print enlargement, viewing
distance and resolution of the human eye. They have been kicking around for a long time
and I thought they were in need of an overhaul.
The 600 rule formula certainly works. However, the 600 rule is
designed for a 5x7 inch enlargement viewed at arms length. These days, we often
display screen-based images and images that are highly reduced from full acquiition size. The 600 rule returns very short exposure times. While the resulting exposures do have very stationary
stars, the indicated exposures are so short that there are not many stars and
very few nebulae showing.
When
you take an exposure without tracking the motion of stars, the length of
exposure is related to how much drift you find acceptable. So I've derived a
revised formula, modernized for DSLRs that takes into account, final viewing
size, size of the pixels in your camera and even a term to account for where
you point the camera in the sky.

where
N..........Number
of pixels of drift*
P..........Pixel
size (microns) (use value from table)
FL.........Focal
length of lens (mm)
d.......... declination. Use the declination of the stars in the field that are closest to the celestial equator (the fastest moving stars) not the center of the camera field.
Cos (d) calculation notes :
Simplification of formula
If
you don’t understand trig or don’t know what declination is, you can leave the
term out of the formula. It just means that in some parts of the sky, you might
be able to make a longer exposure but the formula will calculate a shorter
exposure. You will still get stationary stars.
You
can also eliminate the term when using very wide angle
lenses. They image such a wide range of declinations that the declination term
becomes redundant.
The formula simplifies to :
-

max
exposure time(s) = [14*N*P] .
FL
Note
that most computer software including MS Excel uses radian measure for trig
functions.
Divide the declination by 57.3 to convert to radian measure. [ = COS(d/57.3) ]
* To work out the
value for n
To work out n for my formula look at any image from your camera before you take the pictures in Photoshop or similar program. View a full size image scaled to the screen size you want for the final display image and look at the scaling percentage you want to use for display.
1.5 x100 ÷ scale%
will give you a decent value for n.
You can also calculate it from pixel dimensions.
Example if you have a 24MPx camera and want to display a
1000x1500 image
24MPx Sensor has 4000 x
6000 pixels
Final display image is 1000 x 1500 pixels
Scale factor = 4000/1000 = 4
n = scale factor x 1.5 = 6
But if
Sensor has 4000 x 6000 pixels
Display image 400 x 600 pixels
Scale factor 10
n=10 x 1.5 = 15
Example : Using a 14mm lens, 5 pixels drift, on an
APS-C sensor with 5.4µm pixels pointed at the celestial equator
can take a 27
sec exposure. Pointed at the SCP the lens will see 45 degrees each side of the
pole extends the time to 38 seconds.
Remember that
when using an ultrawide lens, some part of the field is probably
pointing at or near the celestial equator so that D=0 and COS (D) =1and
can be left out of the equation.
The
following table is calculated for an average APSC DSLR, 16 MPx.
N= 5 Pixels trailing allows an image of 1500 pixels wide to be displayed -
ie a full screen
image on a 20-24 inch monitor.
|
Generate
|
Table |
|
ENTER=> Number pixels trail |
7 |
|
ENTER=>
DSLR Pixel size (µm) |
4.8 |
MAXIMUM EXPOSURE TIME IN SECONDS
|
FOCAL LENGTH => |
10 |
15 |
20 |
30 |
50 |
100 |
200 |
300 |
400 |
|
Declination |
|
|
|
|
|
|
|
|
|
|
0 |
47 |
31 |
24 |
16 |
9 |
5 |
2 |
2 |
1 |
|
10 |
48 |
32 |
24 |
16 |
10 |
5 |
2 |
2 |
1 |
|
20 |
50 |
33 |
25 |
17 |
10 |
5 |
3 |
2 |
1 |
|
30 |
54 |
36 |
27 |
18 |
11 |
5 |
3 |
2 |
1 |
|
40 |
61 |
41 |
31 |
20 |
12 |
6 |
3 |
2 |
2 |
|
50 |
|
49 |
37 |
24 |
15 |
7 |
4 |
2 |
2 |
|
60 |
|
|
47 |
31 |
19 |
9 |
5 |
3 |
2 |
|
65 |
|
|
|
37 |
22 |
11 |
6 |
4 |
3 |
|
70 |
|
|
|
|
28 |
14 |
7 |
5 |
3 |
|
75 |
|
|
|
|
36 |
18 |
9 |
6 |
5 |
|
80 |
|
|
|
|
|
27 |
14 |
9 |
7 |
|
85 |
|
|
|
|
|
|
27 |
18 |
14 |
Taking
the pictures
Using
the formula, work out the maximum exposure time for various focal length lenses
you own. Then prepare for your field
trip. Use the most solid tripod you can
beg borrow or buy. You will need some
sort of shutter release. Either a cable
switch, infra red remote control. Some cameras allow remote control from a
smart phone via an ap. You can also use
self-timer since all the exposures are usually less than 30 seconds.
All
of the wide-angle example images were taken from at least 100km outside the city
in dark country skies. Shooting from the city will result in fogged bright
skies. You can get reasonably dark skies by travelling to the edge of the city
and looking away from the city. The telephoto image just below was taken from
the ACTEW water pumping station on Stockdill Drive at
Holt which has reasonably dark skies when looking to the west across the Brindabellas. Lake George lookout (lower) has decent
eastern skies and Namadgi, Tidbinbilla and the Cotter
have reasonably dark southern skies.
Examples
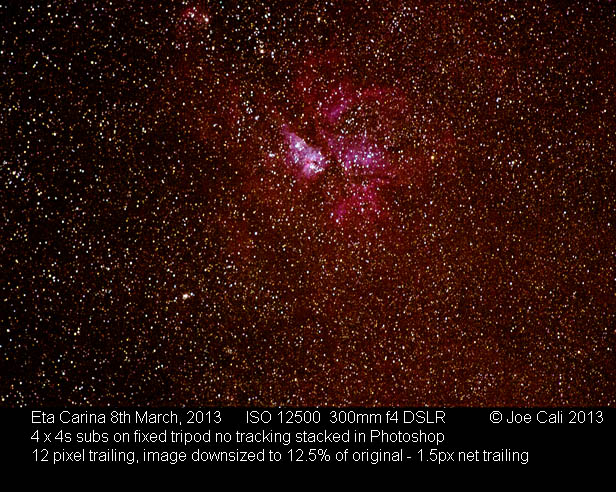
The
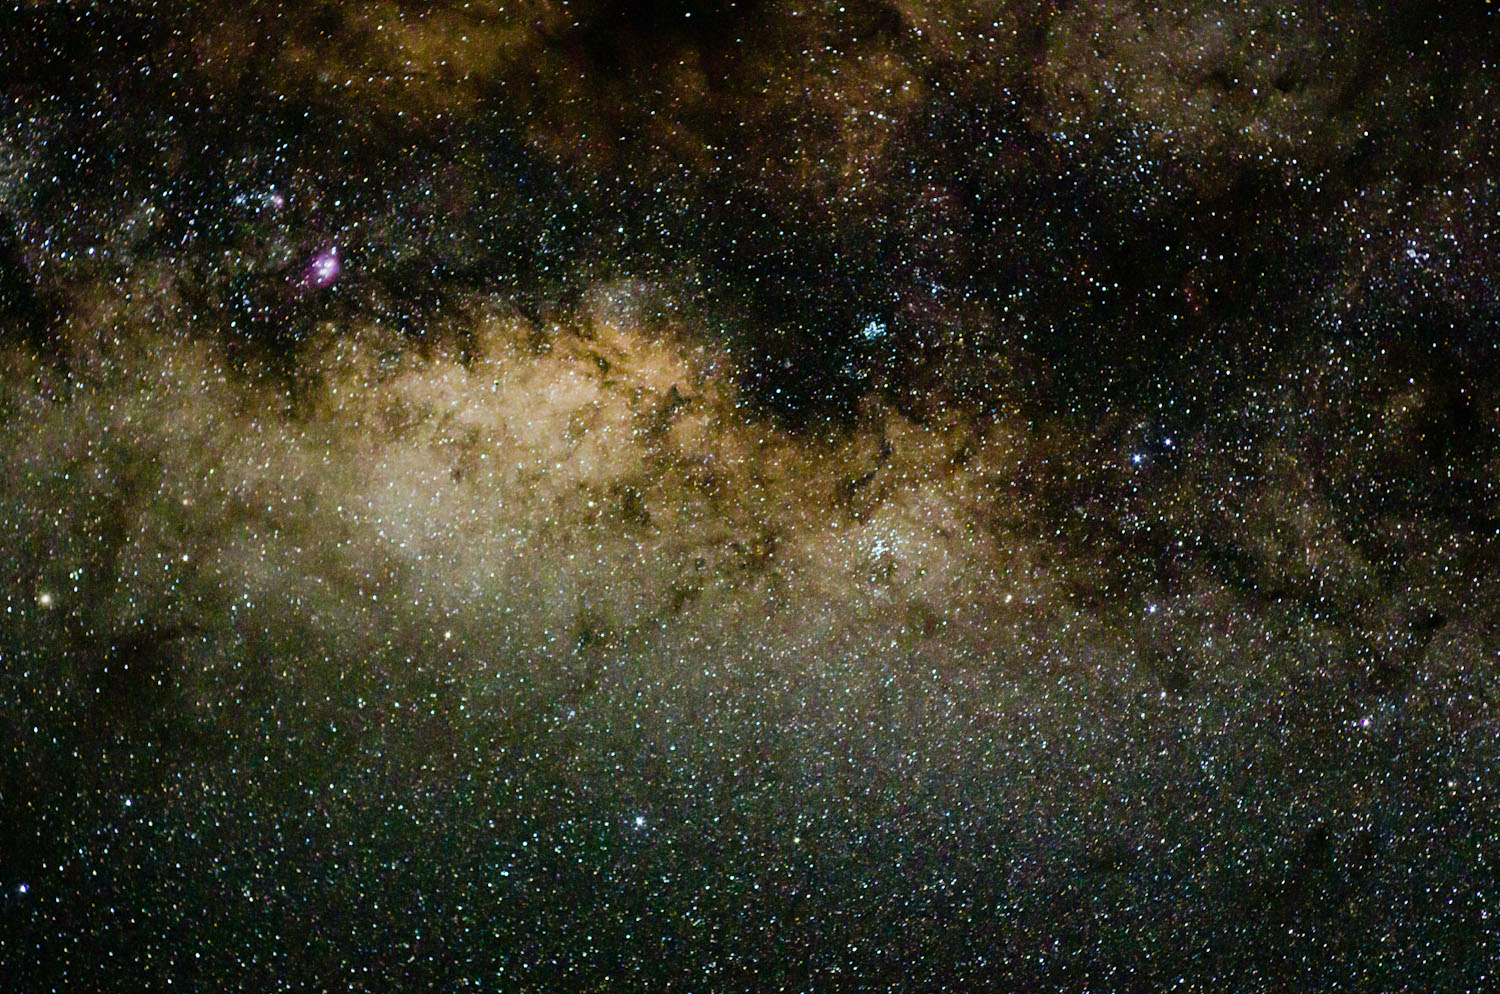
above image was taken with a 300mm f4 telephoto. 12 pixel
trailing was allowed because the image was only ever going to be displayed at
12.5% scaling.
N
= 100%÷12.5% x 1.5 = 12 pixel trail.
max
exposure time(s) = [14*N*P] / [FL*cos(d)]
= 14 x 12 x 5.5 / [300 x
cos (40)]
= 4s
At
ISO 12500, four exposures of 4s were made in rapid succession aligned and
stacked to produce the above image. The effective exposure is 16s. If you want
to learn how to stack images in photoshop, Google “stacking astro
images in photoshop” and you will get dozens of links to videos and web pages
describing the process some with Adobe Photoshop some with other software.
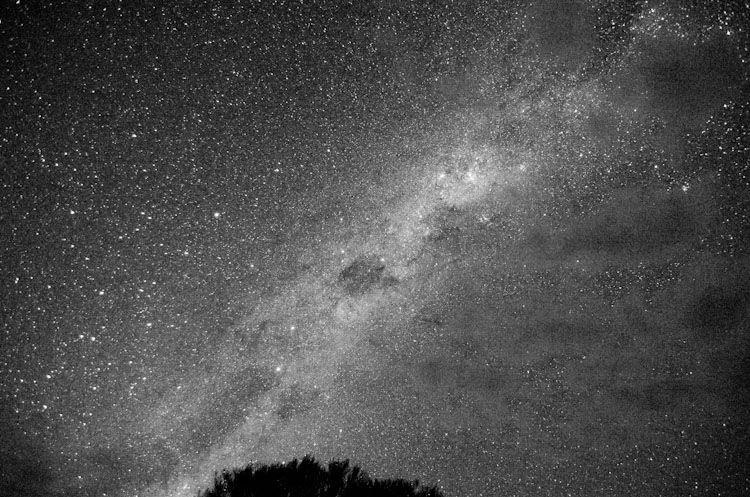
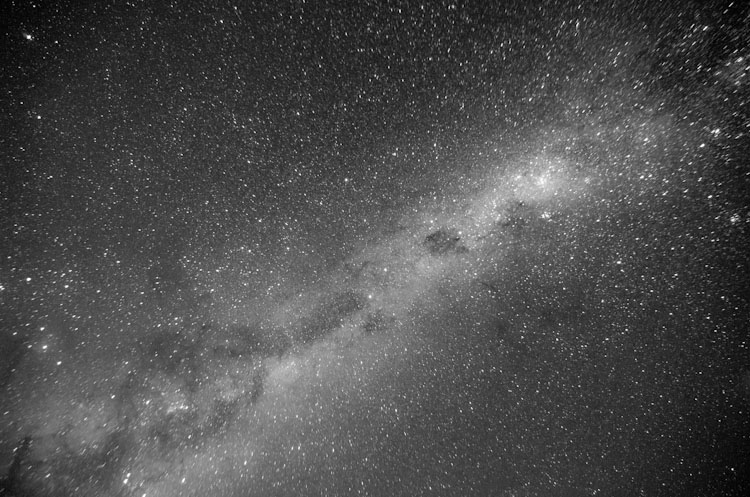
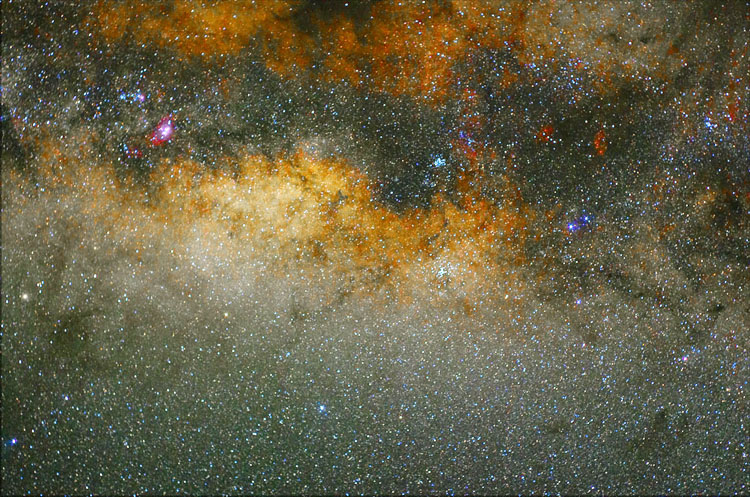
Above
Image taken at ISO 25600
17 mm f/2.8 15s Below Image for comparison taken at ISO 800 12 mm f/4 300s tracked with Astro
Trace tracking. The high ISO image has more noise while the low ISO tracked image has
tracking errors and artefacts. Images captured in raw and processed in
Lightroom.
Image
above taken at ISO 3200 50 mm
f/1.7 8s exposure. Raw capture + Lightroom processing. Years ago, such an image would have required up
to 60 minutes precision tracking. I captured four identical 8s exposures in
rapid succession at the same time as the image above. In the image below, the
four exposures were stacked up as layers in Adobe Photoshop. The images were
aligned to cancel out star movement from image to image then the images were
added together to make a longer exposure.
The addition of 4 images results in the added benefit of averaging and
cancelling out of noise resulting in a smoother as well as brighter image.
Image has also had adjustments to brightness and colour saturation to enhance
nebulae.
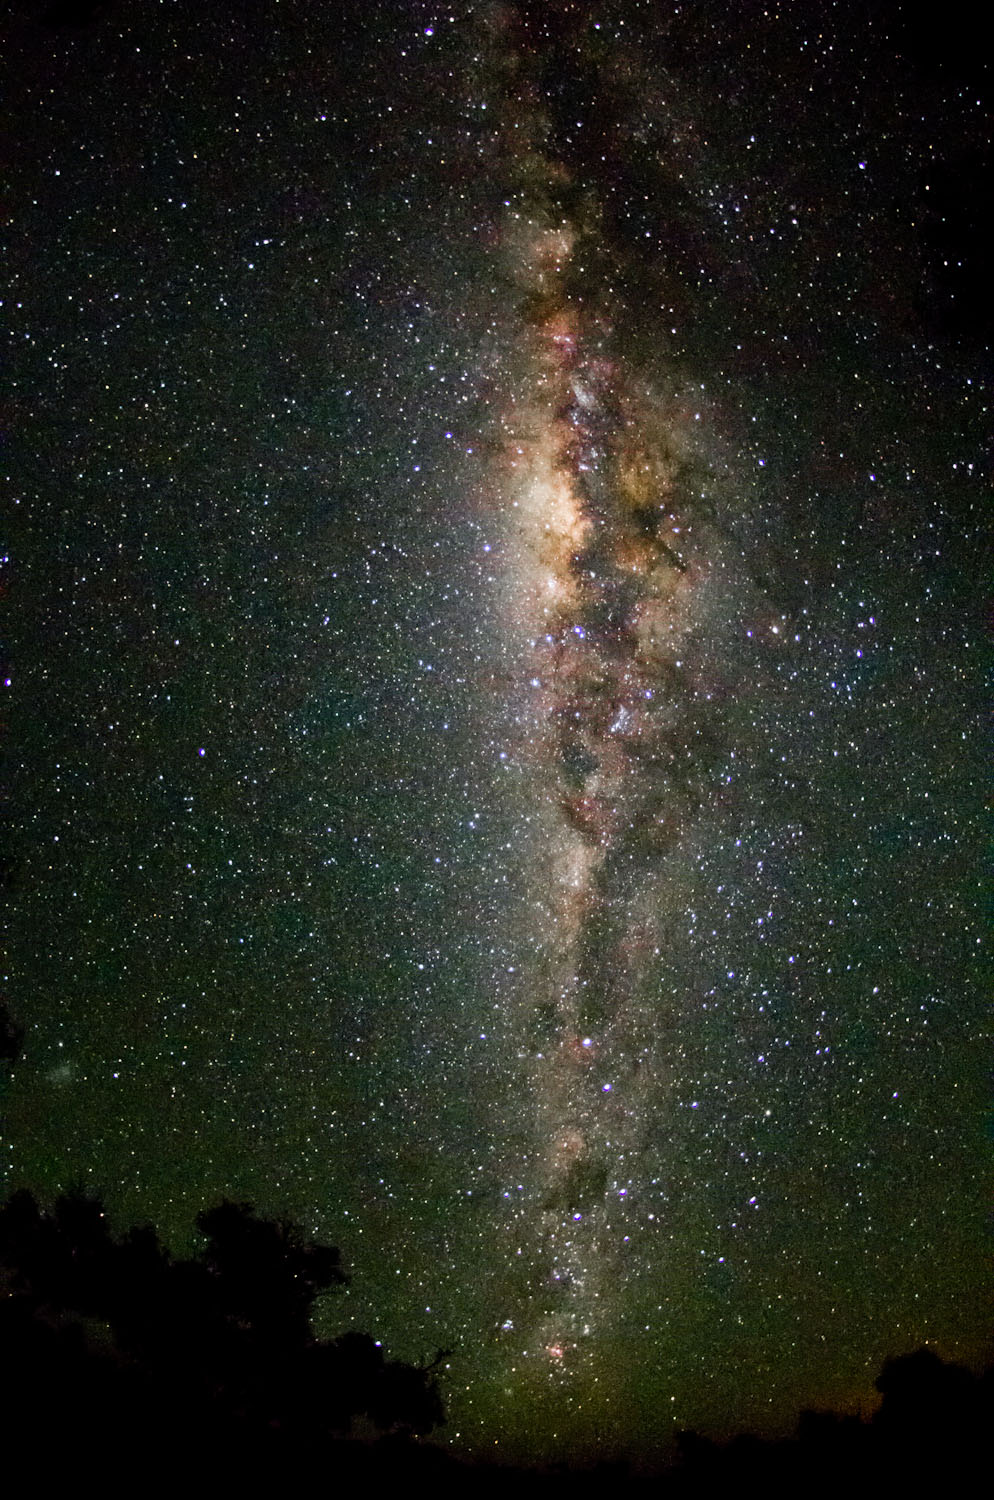
The above image was taken with an ultrawide angle lens.
ISO 12800 10 mm f/3.5
20 s Image captured in raw and processed in
Lightroom.
Don’t be afraid to experiment and have some
fun!
| PHOTOGRAPHY | ECLIPSES | ASTRONOMY |